Laying a slab base for a Steel Shed is something that allegedly, anyone can do. To prove that point, Guaranteed Irish members, Sheds Direct, asked their bespectacled computer-desk dweller, Sean, to lay a base for his new steel shed.
Sean isn’t (and how do we put this nicely) …made for the outdoors, or indeed for labour-intensive work. He’s got the complexion of a man who gets sunburnt from sitting in-front of the Xbox, so unlike the rest of the team, this kind of stuff doesn’t come easy to him. He needed a shed to clear out the spare room in his house though, so he set about laying a slab base with his Dad, Tom and his lurcher, Jasper.
We asked Sean to document the experience for us, to show that any eejit can lay a shed base:
Preparation
So, I started off this whole exercise by trying to find the best spot in the garden for the shed.
We’d bought a house that had a big, ugly, green shed in it already and I believed that the solid level base underneath it would be suitable. I was informed that the shed was probably built in the 50s or 60s and to be honest, it looked like it had been, alright. It was made with lead and it was nothing short of being a death-trap; but it did appear to have a solid foundation under it.
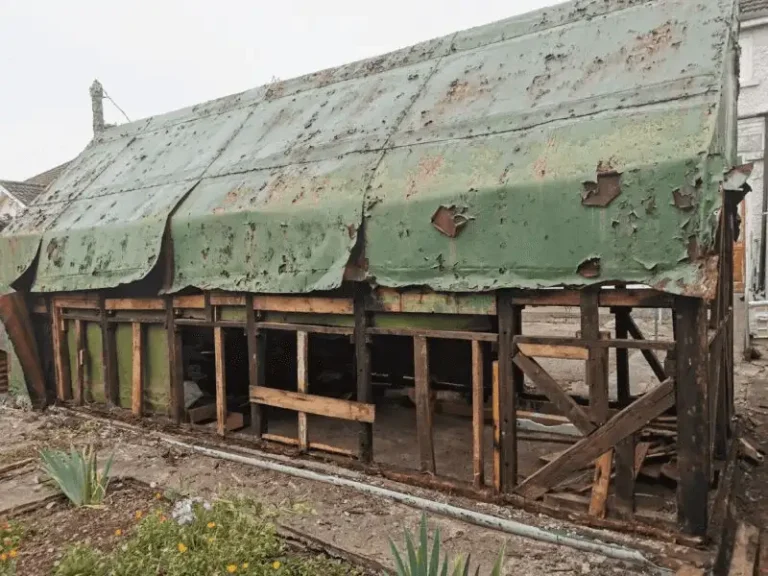
So, we stripped the bottom level of sheet metal from the frame of the shed and it was felled – and I’m not exaggerating – with a push from the short end of a hurl. It came down in seconds, like a cake with no internal structure under the scrutiny of Paul Hollywood.
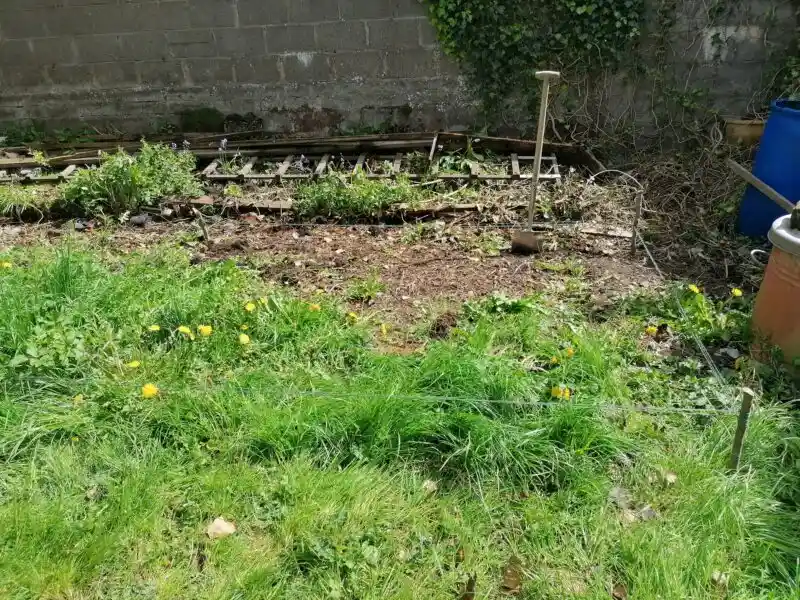
Once we’d removed the sheets piece by piece into a skip, we inspected the base. Unfortunately, I’d totally miss-judged how bad it really was. There was a good half-foot of a step down into if for a start. The concrete underneath also wasn’t as thick as we’d thought either. The shed coming down had cracked it and it came apart with little effort. It wasn’t ideal, so we decided to go to the end of the garden instead. This meant more work, but it would mean that there would be less hassle in the long run.
Lesson learned: Just because you have a seemingly solid base in place already, it might not be up to the task.
I picked a spot not too close to the wall (don’t put your shed up against a wall), that wasn’t under a tree and that was relatively level. We measured out a base that was 1ft larger on both sides and then placed down stakes at each point. I was getting an 8ft x 6ft shed, so I measured out 9ft x 7ft. I used some twine to mark off the area. This made digging the spot much easier later – and it also helped give us an idea of what the shed would look like when it was in place.
Purchasing The Goods
You can’t go laying a slab base if you don’t have the materials. So, with the spot chosen, I headed off to my local builder’s merchants to pick up what I needed. I spoke to one of the staff members there and told him that I needed to get a base that was 9ft x 7ft – and that I needed some sand/gravel to lay them onto. They said that I needed 35 slabs and a tonne of gravel for the job. I paid there and then and I was very lucky with my delivery slot – less that 3 hours later, the goods were at the door ready to go. I’d paid less than €200 for all this. I did not purchase a damp proof membrane at this time, but if you need one, this’d be the time to get it. (Side note: These prices were accurate at the time of writing and have probably drastically changed in the time since)
At this time, I thought a tonne of gravel was an excessive amount, but you’d be surprised how much you use. By the end of it, I’d only about 1/8 of the bag left over.
Tools
With the slabs and gravel ready to go, I got my hands on:
- A large shovel
- A large fork
- Measuring Tape
- A Rake
- A large, level piece of wood
- A spirit level
- Rubber Mallet
- Working gloves
The Dig
As you can see from the image of the spot we picked above, it was a pretty rugged piece of land. The area with grass wasn’t too bad – the soil there was pretty easy to dig, but the bare area was filled with rock and pieces of plastics and tile that the previous owner appears to have buried. The Fork became very handy here, allowing us to turn the soil and bring the debris to the top before shovelling it out. We removed most of the rocks, tiles etc by hand and then moved the soil to the back wall of the garden; it will later become a raised bed for plants.
We dug down about 4 inches or so, using the edge from the first cut of the dig to gauge the depth, but at this stage it can be hard to see how you’re getting on.
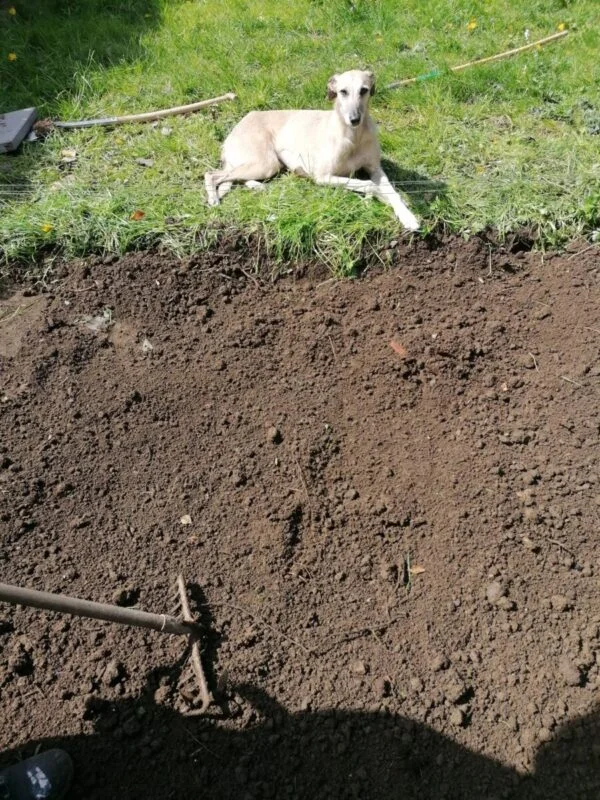
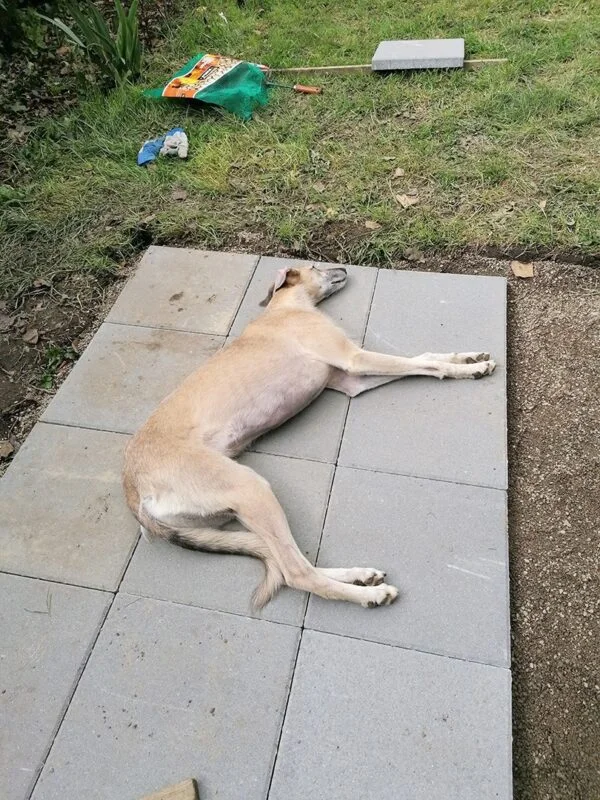
Once we’d dug what we thought was enough, we gave it a pretty rough rake to even it out and see how it looked. You don’t need to be overly thorough at this point, you just want to level it out roughly enough, so that you can see if you need to dig further or not. We were happy enough and once Foreman Jasper (pictured below) gave us the all clear, we were good to start bringing in the gravel.
*Note: Before you do anything else, make sure that the area you’ve dug is large enough to accommodate the slabs that you have. You’re getting yourself a helluva lot extra work later if you don’t have it correct now.
Transferring the Gravel
This was surprisingly, the most poxy part of laying the slab base. A tonne of gravel isn’t going to be moved by hand, so this big ol’ bag needs to be tipped away at. Using an old hand cart that I’d gotten from work, I shovelled 10-12 scoops at a time and dragged the load up the back garden to the shed. At this point, I fully understood the benefits of a Wheelbarrow. While we got the gravel up to the site in the hand-cart, it was a considerably bigger chore than it needed to be; a wheelbarrow would have made this very easy. So either get one for the task, or see if a friend has a loan.
Either way, once you have the gravel in position, simply tip it into the pit that you’ve made. Below you can see the impact of just one of the hand carts worth of gravel.
Smoothing Out the Gravel
While it wasn’t possible for us, I wouldn’t recommend throwing down the full worth’s of gravel in one go. We found that adding it slowly and smoothing it out with a rake as we went, helped to fill any divots and lumps easily. We smoothed as we went and that made the final smoothing task much easier.
Once your gravel is relatively level to the eye, grab that long, level piece of wood that we mentioned earlier. Position it at the top of the base and drag it evenly across the surface. You can see the plank I used at the top here and that convenient orange arrow shows the direction that we dragged it.
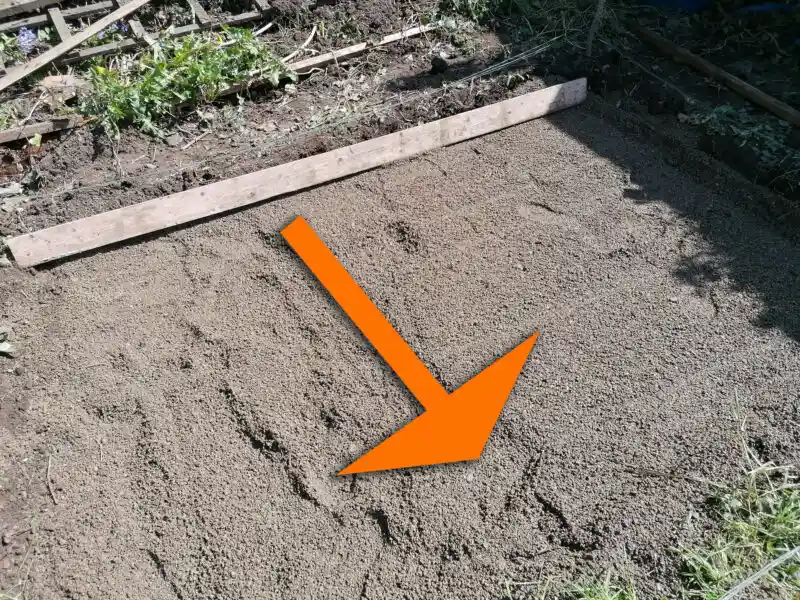
This isn’t an exact science and while there are ways to make it more accurate, we just did several sweeps of it. When we noticed that excess gravel had been dragged by the plank, we transferred it to the areas where the plank was sailing over without touching any gravel. It took a few goes, but it was pretty-much done by the 4th sweep. Once we were happy, we sat the plank on top of the gravel at several points and used the spirit level to check that it was okay.
Remember to check that it’s level on both axises, i.e. across and deep. You could be entirely level horizontally, but you might have a slope from front to back, for example. Once this is done, you should have a pretty level base.
At this point, we had a cup of coffee and sat back to admire our work and talk about the League of Ireland and what a great job we were doing. Which was very enjoyable, but it allowed enough time for the weather to change fairly drastically. The sun ducked out and a rake of hail fell. The foreman wasn’t happy at all and we’d to call a halt to that Sunday’s work. We came back to it two days later to finish it off.
Optional: Damp-Proof Membrane
It’s at this point that you could lay your damp-proof membrane. I was aware that it might be needed, but as I’m only using the shed to store small garden tools, ladders, paint etc., I had no real concern with condensation arising in this shed. If you are getting your shed with the goal of storing something that’d be affected by damp, I’d strongly recommend getting a damp-proof membrane down.
Actually Laying a Slab Base
Right, so once I’d smoothed out the new divots made by pigeons looking for worms, I was ready to lay the slabs. This is where I’d strongly recommend using working gloves. The slabs aren’t very jagged, but the constant picking and reworking of them can cut away at your palms. Even with calloused fairly calloused fingers, I still managed to cut up my hands before I remembered that I had the gloves. As for laying the slabs, it was a slow, but easy enough process.
Top tip – down drop them from a height like an eejit, onto your freshly levelled out gravel. Also, don’t then hoosh the dropped slab into place with your foot, further disrupting your formerly perfectly-level gravel. I’m not saying that I did this of course, I’m just saying that it’s something that you shouldn’t do. And if you did do it, take the slabs up and re-level your base and apologise to whoever’s helping you.
Instead, slowly ease of the slabs into one of the corners of your base. Position it so that it’s filling the right-angle that you’d dug and once you’re happy, tap the centre of the paving slab a few times with a rubber mallet. My dad gave a great tip to avoid cracking the slabs – he placed a large, wide piece of wood upon the slab and hit that. Because of the larger surface area, the slab went down easier and the chance of cracking was massively reduced.
Once it’s done, it should not move when you stand on it and sway from side to side. Continue to lay the slabs until you are complete; using the last one to align the one in hand. I’d recommend double-checking every slab with the spirit-level to ensure it’s all hunky dory. Don’t just check the individual slabs either, check that the slabs beside each other are also level when combined.
Summary: What Went Right and What Went Wrong.
So the whole point of this exercise was to see if someone who’s not very handy could lay a solid, level base for a shed. Here are the take-away points:
- Straight off the bat, without the help from my Dad, this would have been a much slower, much swearier event, so shoutout to Tom for keeping things on track. I’d also advise having someone help you out with this, two shorten the road and all that.
- Secondly, I’d not gotten cement mix for the shed. It’s strongly advised to do so, but at this stage, beyond pulling everything up and starting afresh, there wasn’t much that I could do. With that said, the slabs are stead-fast fixed in place and even with my best Riverdance impressions on them, they’re not budging. We did lamp them down fairly hard with the mallet using that piece of wood to prevent cracking, so all in all, I’m pretty happy.
- While a wheelbarrow isn’t essential for this work, I do wish I’d gotten one ahead of time. Using the old hand-cart made everything that little bit more stressful – and to be honest, a wheelbarrow is always going to be handy for around the garden anyway.
I’d also strained by back towards the end of job by not lifting the last few slabs correctly. It’s not something you might think of, but if like me you’re not very DIY orientated, you might overlook this aspect of this and give yourself an evening on the couch complaining. I’m all a-okay now (thanks for your concern), but it was a stupid thing to overlook. - This one is an odd one, but I didn’t think to ask the guy from Murdocks to unload the tonne of gravel into a particular place. He dropped it where I asked him to, but where I asked him to was where I normally park my car. So if you can, get it out of the way when they’re delivering.
Finally: Getting the Shed In!
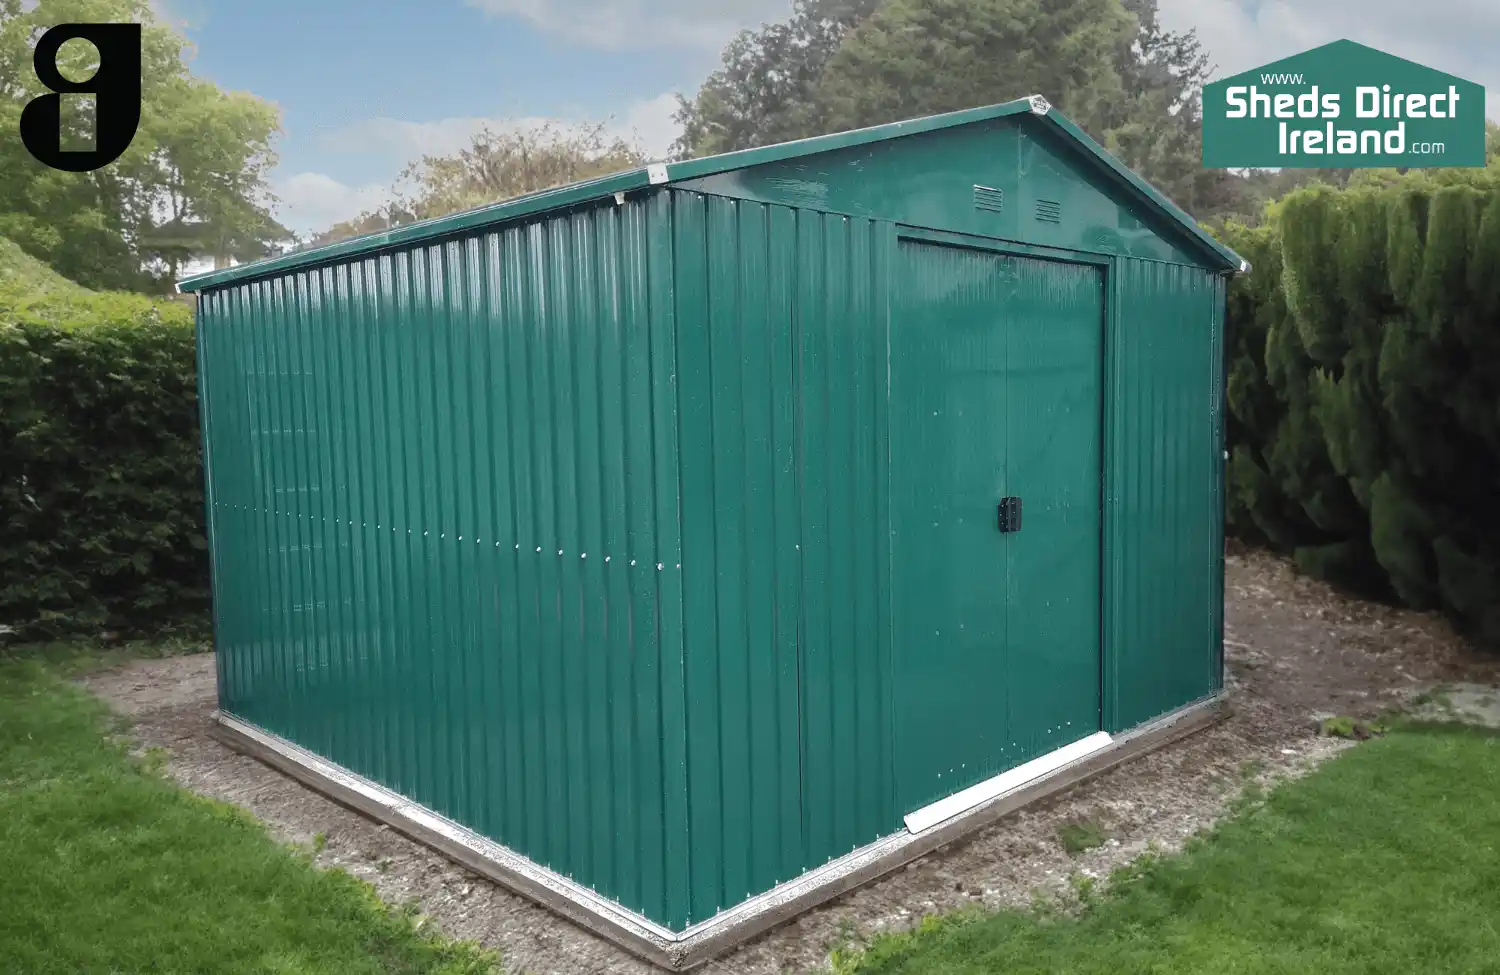
Once you’re done laying a slab base, you’re ready to get your shed installed! Deadly!
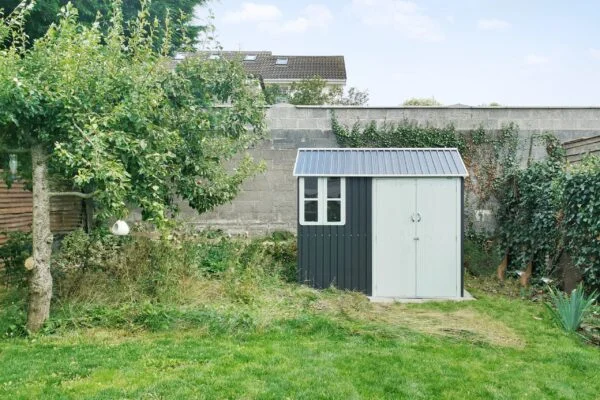
For me, the base was about as much as I’d tackle. I’ve taken my own advice regarding self-assembly and opted to get the Assembly Team to build my shed for me. They did a great job (though I still need to work on that bee-friendly meadow thing to the left of the frame)
If you are looking for a new shed or shed base, visit Shedsdirectireland.com or visit them at Unit 50, Jamestown Business Park, Jamestown Road, Finglas, Co Dublin.